



-
0
-
0
-

0
-
0
-
0
-
0
-
0
-

0


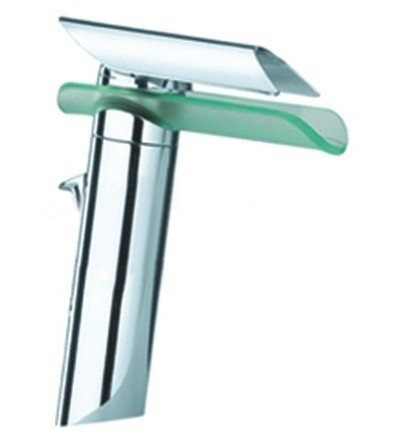
Description:
Unit Type: piece Package Weight: 1.1kg Package Size: 52cm x 23cm x 10cm
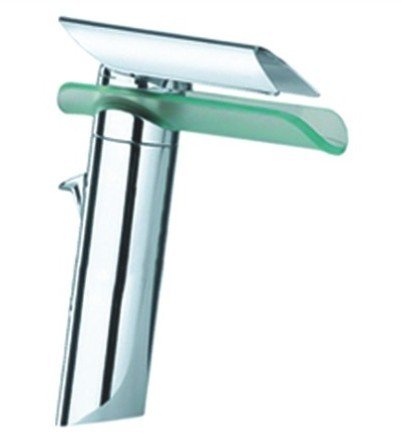
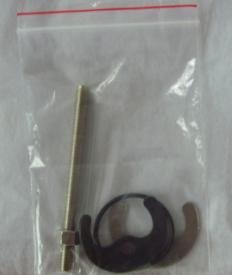
fixing parts:
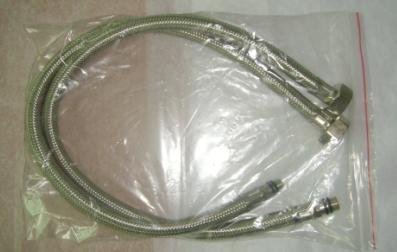
products description:
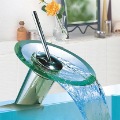
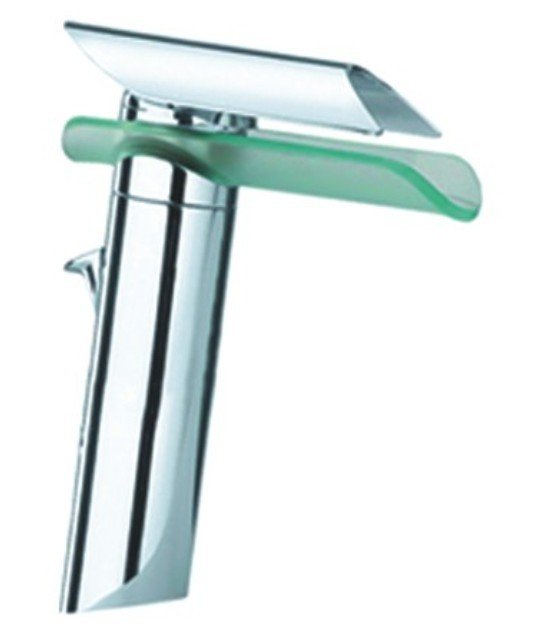
1.single glass faucet
2.brass body,zinc handle, caramic 40# cartridge
3.with glass
4. 5 years warranties
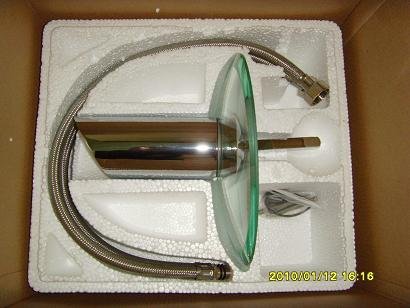
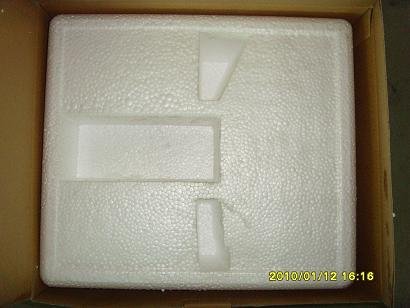
5.foam packing
6.cheap price with high quality
7.buyers pay for freight charges, other charges
8.Generally, sending goods in 3 days when receiving money
9.Shippment by courrier, such as DHL, UPS,EMS
10.below is packing pictures:
Features
This sleek chrome and glass faucet has elegant lines for all its simplicity. Ideal for sink installations, the single handle also allows for easy temperature adjustment, making this faucet easy and convenient to use – even for soapy hands!
Leak Resistant: All our faucets have passed repeated quality testing to ensure that leaks do not occur, even at high pressures up to 1.6Mpa.
Heat Resistant: Our high quality ceramic valves are made to exceed all applicable industry standards, and are extraordinarily heat resistant.
Long Lifespan: The faucets were designed for long term use, and the service life of our valves are above the industry standard, able to withstand over 600,000 uses.
Fine Finish: A well chrome-plated faucet looks dignified and with a little verdant color. Our faucets have been proved to meet high requirement of United States and European chrome-plating standard.
Easy Installation: All our faucets are designed to be easy to install. Simply follow the instructions listed below for how to assemble the parts.
General Faucet Installation Instruction:
Please kindly note that this is just a general instruction
Step 1: Position the Faucet
A: Begin installing your faucet by placing the gasket and faucet in position on the sink.
B: From under the sink, thread the plastic mounting nuts onto the faucet shanks. Be sure the large side of each plastic mounting nut is up.
C: From the top of the sink, check the faucet and gasket position.
D: From under the sink tighten the mounting nuts, making certain not to over-tighten which could damage the nuts and make them difficult to remove in the future.
Step 2: Attach the Water Supply Tubes
A: Wrap the threads of the water-supply valve with Teflon tape. Although most plumbers use only Teflon tape, some plumbing supply manufacturers also recommend using plumber’s putty.
B: Thread the water supply nut onto the shut-off valve. Tighten the nut with a wrench.
C: Wrap the threads on the faucet shank with Teflon tape, and then thread the water supply nut onto the faucet shank.
D: Tighten the nut with a wrench.
Step 3: Connect the Faucet Lift Rod
General Faucet Installation Instruction
Please kindly note that this is just a general instruction
Step 1: Position the Faucet
A: Begin installing your faucet by placing the gasket and faucet in position on the sink.
B: From under the sink, thread the plastic mounting nuts onto the faucet shanks. Be sure the large side of each plastic mounting nut is up.
C: From the top of the sink, check the faucet and gasket position.
D: From under the sink tighten the mounting nuts, making certain not to over-tighten which could damage the nuts and make them difficult to remove in the future.
Step 2: Attach the Water Supply Tubes
A: Wrap the threads of the water-supply valve with Teflon tape. Although most plumbers use only Teflon tape, some plumbing supply manufacturers also recommend using plumber’s putty.
B: Thread the water supply nut onto the shut-off valve. Tighten the nut with a wrench.
C: Wrap the threads on the faucet shank with Teflon tape, and then thread the water supply nut onto the faucet shank.
D: Tighten the nut with a wrench.
Step 3: Connect the Faucet Lift Rod
A-1: From the top of the sink, insert the lift-rod into the faucet.
A-2: From under the sink, make sure the pivot-rod is in the down position. Insert the lift-rod into the lift-rod strap. Tighten the screw.
B-1: From the top of the sink, make sure the lift-rod opens and closes the drain plug as desired.
B-2: Make any needed adjustments by loosening the lift-rod strap screw and repositioning the lift-rod.
B-3: If you need to connect the lift-rod strap to the pivot rod, slide one end of the spring clip onto the pivot-rod.
B-4: Make sure that both the pivot -rod and the lift-rod are in the down position. Insert the pivot-rod in the closest hole in the lift-rod strap.
B-5: Slide the other end of the pivot-rod. Make sure the lift-rod opens and closes the drain plug as desired.
C-1: Make minor adjustments by loosening the lift-rod strap screw and repositioning the lift-rod.
C-2: Make major adjustments by removing the spring clip and moving the pivot-rod to a different hole in the lift-rod strap.
Step 4: Flush the Faucet
A-1: Anytime you work on plumbing, filings, chips, and other debris can fall into the plumbing pipes.
A-2: This debris can damage the sealing surfaces inside the faucet and cause leaks.
A-3: Remove aerator and black sealing gasket above it.
A-4: Before turning on the water supply, make sure the faucet handles are open (on position) in order to remove the debris without causing damage.
B: Open both water supply valves under the sink.
C-1: Allow the water to run for 15 seconds.
C-2: Close the faucet handles (turn off).
D: Make sure any debris is cleaned from the aerator screen.
E: Replace the aerator. A-1: From the top of the sink, insert the lift-rod into the faucet.
A-2: From under the sink, make sure the pivot-rod is in the down position. Insert the lift-rod into the lift-rod strap. Tighten the screw.
B-1: From the top of the sink, make sure the lift-rod opens and closes the drain plug as desired.
B-2: Make any needed adjustments by loosening the lift-rod strap screw and repositioning the lift-rod.
B-3: If you need to connect the lift-rod strap to the pivot rod, slide one end of the spring clip onto the pivot-rod.
B-4: Make sure that both the pivot -rod and the lift-rod are in the down position. Insert the pivot-rod in the closest hole in the lift-rod strap.
B-5: Slide the other end of the pivot-rod. Make sure the lift-rod opens and closes the drain plug as desired.
C-1: Make minor adjustments by loosening the lift-rod strap screw and repositioning the lift-rod.
C-2: Make major adjustments by removing the spring clip and moving the pivot-rod to a different hole in the lift-rod strap.
Step 4: Flush the Faucet
A-1: Anytime you work on plumbing, filings, chips, and other debris can fall into the plumbing pipes.
A-2: This debris can damage the sealing surfaces inside the faucet and cause leaks.
A-3: Remove aerator and black sealing gasket above it.
A-4: Before turning on the water supply, make sure the faucet handles are open (on position) in order to remove the debris without causing damage.
B: Open both water supply valves under the sink.
C-1: Allow the water to run for 15 seconds.
C-2: Close the faucet handles (turn off).
D: Make sure any debris is cleaned from the aerator screen.
E: Replace the aerator.
Transaction History


Customers who bought this product also purchased...




Product Reviews: 
| Buyer | Feedback | reviews text |
|---|---|---|
Bryan S.
|
Very nice!! I like!!
25 July 2026 |
|
John Holland
|
Really good product... Thanks for the gift Command receive quickly Godd supplier...
24 April 2026 |
|
Hakan Y.
|
Wonderfull! Very Nice! And Ecxellent Supplier!
18 July 2026 |
|
Bryan S.
|
very good product, very good supply
16 August 2026 |
|
Stephen James
|
Very good seller and very nice product. Works perfectly. Now I can give a litlle party...rs.rs..thanks.
04 August 2026 |
|
Maykon S.
|
power adapter not true for the vast majority of Spain outlets but otherwise well
07 August 2026 |
|
Jon F.
|
It's cool! Thanks!
01 June 2026 |
|
| Rita Zhao
|
very pleased with the product, will hopefully order more shortly
29 June 2026 |
Write a Review:
Tell us what you think about this item, share your opinion with other people. Please make sure that your review focus on this item. All the reviews are moderated and will be reviewed within two business days. Inappropriate reviews will not be posted.
Have any question or inquire for this item? Please contact Customer Service. (Our customer representative will get back shortly.)
-
Interested in this Product?
Buy Now
Related Categories
Search Feedback
- Did you find what you were looking for?
- If you need help please contact us sales@chinaamanda.com
Recently Sold items

 Klikko Tek KT-450...
US$77.29 Black Underwear Full...
US$163.99 Brand New Kyosho Glo...
US$82.09 Ballet Dancers, 925 ...
US$51.19 2011 Style 9.5 Cm La...
US$59.79 8 Holes Full Automat...
US$169.99 Super High Heel Summ...
US$54.09 Red Real Leather Low...
US$62.19 Wholesale Men's Sexy...
US$157.19 Wholesale - Men's Se...
US$158.49

Be a member
for online shopping




Note: Stock and Availability shown on this site is for your reference only.
While we strive to provide the most accurate and timely stock and availability information,
availability information may become out of date and may change between the time you added an item to cart and the time your order is received.
Buy wholesale products at wholesale price from leading China wholesale website, enjoy online wholesale and become a wholesaler now!
Global Online Shopping for International Buyers
